

Introduction
Get ready to fall in love with your new favorite weeknight hero! These Tortilla Wraps with Ground Beef are the ultimate trifecta: incredibly flavorful, satisfyingly juicy, and deceptively simple to make. Imagine perfectly seasoned ground beef, a creamy, dreamy sauce, and all your favorite fresh toppings, all bundled up in a soft, warm tortilla. It’s the kind of meal that has everyone rushing to the dinner table. I first started making these as a “clean out the fridge” solution, but they quickly became a requested classic in our house—my kids even prefer them over takeout tacos! What makes this dish so special is its beautiful flexibility. It’s a 30-minute wonder that caters to every taste bud, making it the perfect family-friendly solution for busy evenings. If you’re a fan of my One-Pan Taco Pasta, you’ll adore these wraps for the same reason: maximum flavor with minimal fuss and cleanup. So, grab your skillet and your appetite—it’s time to create a meal that’s guaranteed to bring smiles and empty plates.
Table of Contents
What is a Tortilla Wrap with Ground Beef?
Is it a taco? A burrito? A glorious, handheld feast? Let’s call it what it is: the best dinner decision you’ll make all week. The name “Tortilla Wraps with Ground Beef” is wonderfully straightforward—no fancy jargon here, just a clear promise of deliciousness. I like to think of it as the savvy cousin of the classic taco, opting for a full, snug wrap over an open shell. It’s the perfect vehicle for holding all that amazing filling without the dreaded “bottom fallout” that can plague its crispy-shelled relatives. Why “wrap”? Because you get to bundle up all that savory beef, melty cheese, and cool toppings into one neat, portable package. After all, as the classic saying goes, ‘the way to a person’s heart is through their stomach,’ and these wraps are practically a direct route. Ready to wrap your way to a happier dinner? Let’s get started.
Why You’ll Love This Recipe
- Customizable Family Feast: This is the star quality. These wraps are a complete, balanced meal in your hand, and the best part is that everyone can build their own. Set out the toppings and let your crew create their perfect wrap, making dinner interactive and fun. It’s a guaranteed crowd-pleaser for both kids and adults.
- Budget-Friendly & Quick: Skip the drive-thru and save your cash! Making these Tortilla Wraps with Ground Beef at home is significantly cheaper than feeding a family with fast food, and it’s on the table in about 30 minutes. Using affordable ground beef and pantry staples, this recipe is a lifesaver for your wallet and your schedule.
- Bursting with Flavor & Texture: We’re not just talking about plain beef in a tortilla. This recipe features a rich, savory seasoning blend and a secret weapon—a creamy sauce that soaks into the beef, making it incredibly moist and flavorful. Combined with the contrast of cool, crisp lettuce, juicy tomatoes, and creamy avocado, every bite is a perfect harmony.
If you love the hearty, all-in-one nature of these wraps, you should definitely try my Cheesy Beef and Rice Skillet next—it hits all the same comforting notes!
How to Make Tortilla Wraps with Ground Beef
Quick Overview
This recipe is your ticket to a delicious, no-fuss dinner. In under 30 minutes, you’ll transform simple ingredients into juicy, seasoned ground beef with a rich, creamy base, ready to be wrapped up with all your favorite fresh toppings. It’s all about layering flavor and texture for a supremely satisfying meal.
Key Ingredients
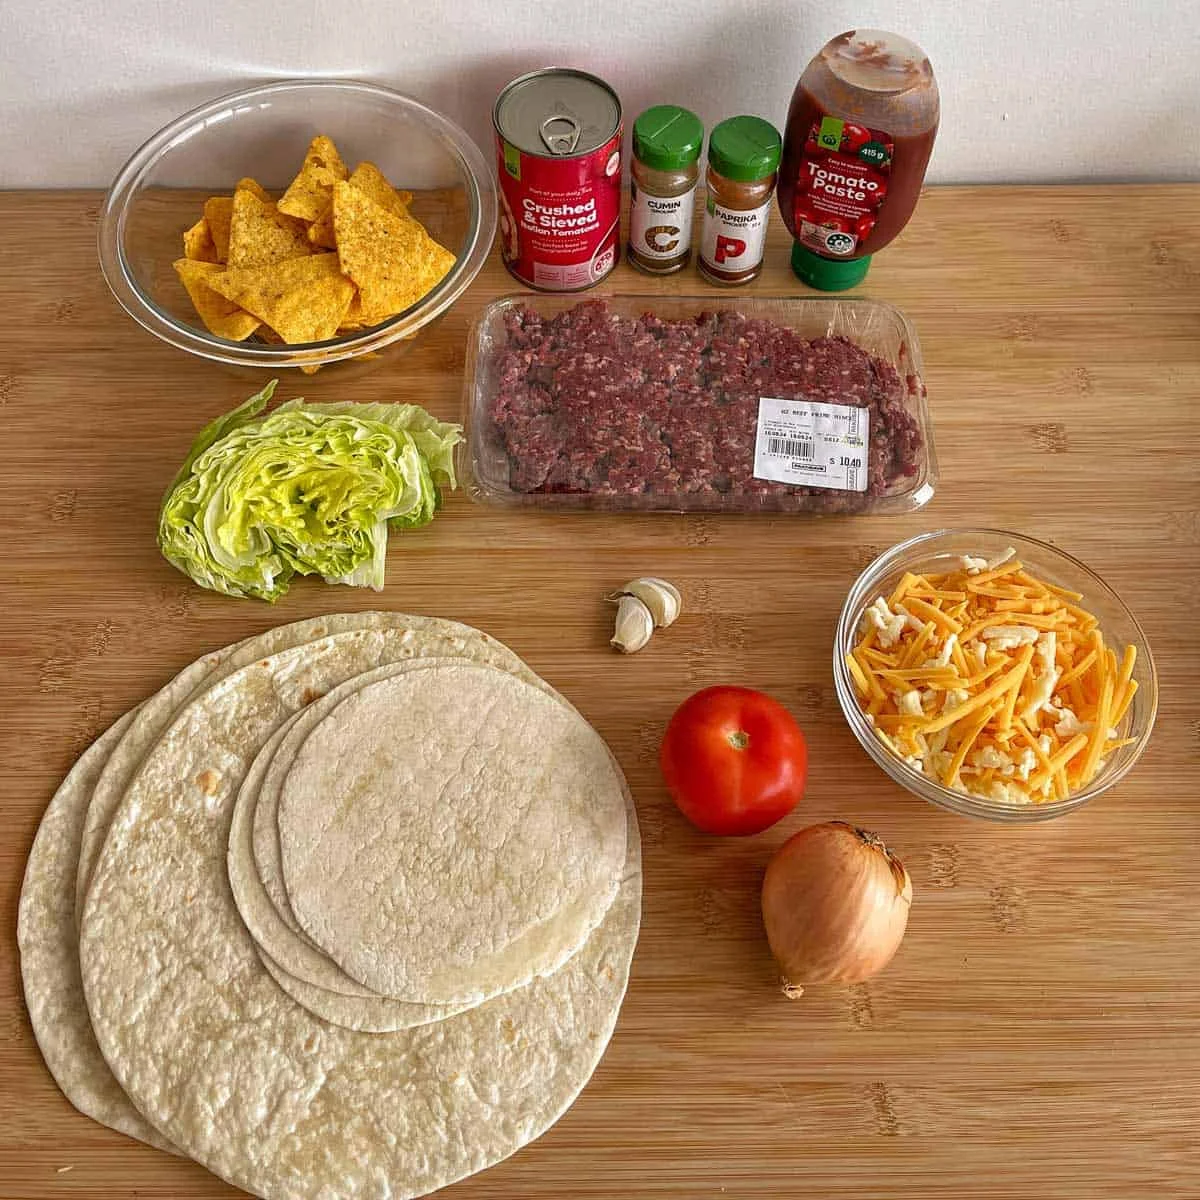
- For the Beef Filling:
- 1 lb ground beef (I prefer 85/15 for best flavor)
- 1 small yellow onion, finely diced
- 2 cloves garlic, minced
- 1 packet (2 tbsp) taco seasoning, or homemade blend
- 1/2 cup beef broth or water
- 1/2 cup sour cream
- 1 cup shredded cheddar or Mexican blend cheese
- 1 tbsp olive oil
- Salt and pepper to taste
- For Assembly & Toppings:
- 6 large burrito-sized flour tortillas
- 2 cups shredded lettuce (romaine or iceberg)
- 1 large tomato, diced
- 1 avocado, sliced or diced
- Extra sour cream, salsa, and hot sauce for serving
Step-by-Step Instructions
- Cook the Aromatics: Heat the olive oil in a large skillet over medium-high heat. Add the diced onion and cook for 3-4 minutes until softened and translucent. Add the minced garlic and cook for another 30 seconds until fragrant.
- Brown the Beef: Add the ground beef to the skillet, breaking it up with a wooden spoon. Cook until it is no longer pink, about 5-7 minutes. Drain any excess grease if necessary.
- Season and Simmer: Sprinkle the taco seasoning over the cooked beef and stir to coat evenly. Pour in the beef broth (or water) and bring to a simmer. Let it cook for 2-3 minutes, allowing the liquid to reduce slightly and the flavors to meld.
- Create the Creamy Base: Reduce the heat to low. Stir in the 1/2 cup of sour cream and the shredded cheese until the cheese is melted and the mixture is creamy and cohesive. Taste and adjust salt and pepper as needed. Remove from heat.
- Warm the Tortillas: While the beef rests for a minute, warm your tortillas. You can do this quickly in a dry skillet for 30 seconds per side, or wrap them in a damp paper towel and microwave for 20-30 seconds. This makes them pliable and prevents tearing.
- Assemble the Wraps: Lay a warm tortilla flat. Spoon a generous portion of the beef mixture down the center. Top with shredded lettuce, diced tomato, and avocado slices.
- Fold and Serve: Fold the sides of the tortilla inward over the filling, then roll it up tightly from the bottom to form a secure wrap. Serve immediately with extra sour cream, salsa, or your favorite hot sauce on the side.
What to Serve Tortilla Wraps With
These wraps are a full meal on their own, but a couple of simple sides can turn it into a feast!
- Classic Sides: A quick Mexican-style rice or creamy refried beans are perfect for scooping up alongside your wrap.
- Light & Fresh: Keep it light with a simple corn and black bean salad or a vibrant chunky pico de gallo.
- For Snacking: A bowl of tortilla chips with restaurant-style salsa or guacamole is always a hit while you’re assembling.
- Drinks: Iced tea, limeade, or a cold Mexican beer complement the flavors perfectly.
Top Tips for Perfecting This Recipe
- Don’t Skip the Tortilla Warm-Up: A cold tortilla cracks. Warming it is non-negotiable for a pliable, easy-to-roll wrap.
- Drain the Grease: For a less greasy filling, be sure to drain the excess fat from the beef after browning. This helps the sauce cling better.
- Control the Heat: The sour cream can “break” or curdle if added to very high heat. Always reduce the heat to low before stirring it in.
- Customize Your Protein: Easily swap the ground beef for ground turkey, chicken, or even plant-based crumbles.
- Avoid Soggy Wraps: If packing for lunch, keep wet toppings (like salsa or extra sour cream) in a separate small container to add just before eating.
Storing and Reheating Tips
- Storing Leftovers: Store the cooled beef filling and toppings separately in airtight containers in the refrigerator. The filling will keep for 3-4 days.
- Reheating Filling: Reheat the beef filling gently in a skillet over medium-low heat, adding a splash of water or broth to loosen it up. You can also microwave it in 30-second intervals, stirring in between.
- Freezing: The beef filling freezes beautifully! Cool it completely, then store in a freezer-safe container or bag for up to 3 months. Thaw overnight in the fridge before reheating.
- Note on Pre-Assembled Wraps: I don’t recommend assembling the full wraps ahead of time, as the tortilla will become soggy. For meal prep, keep all components separate and assemble fresh when ready to eat.
For More Authentic Beef Recipes Visit: waniarecipes.com/?s=ground+beef&ct_post_type=post%3Apage