
Introduction
There’s something magical about the scent of a baking [Apple Pie]—cinnamon and sugar swirling with the tender sweetness of apples, all wrapped in a golden, flaky crust. It’s more than dessert; it’s a warm hug, a slice of nostalgia, and the star of every gathering. But let’s be honest: how many recipes have you tried that promised perfection, only to yield a soggy bottom or a bland filling? Your search ends here. This isn’t just another [Apple Pie Recipe]; it’s the only one you’ll ever need. Designed for simplicity and foolproof success, it delivers that dream pie with a fraction of the stress. Unlike our more deconstructed Apple Crisp, this recipe champions the classic, double-crusted beauty we all crave. It’s family-friendly, surprisingly straightforward, and guaranteed to earn you those “best baker” accolades. So, preheat your oven and let’s create a masterpiece that tastes like home.
Table of Contents
What is Apple Pie?
What’s in a name? When it comes to Apple Pie, the answer is beautiful simplicity. It’s not called “Caramelized Sugar-Spiced Fruit en Croûte,” now is it? No, it’s honestly, wonderfully, apple pie. The name tells you exactly what you’re getting: tender, spiced apples baked in a pie. It’s the culinary equivalent of a firm handshake and a warm smile. Some say the phrase “as American as apple pie” took hold because the dish represents comfort, home, and wholesome goodness. Is the way to someone’s heart truly through their stomach? One bite of this pie, and you’ll be a firm believer. Let’s bake a pie that lives up to its iconic, no-nonsense name.
Why You’ll Love This Apple Pie Recipe
- The Foolproof Flaky Crust: The cornerstone of any great [Apple Pie] is its crust. This recipe uses a simple, vinegar-enhanced dough that comes together in minutes and bakes up into layers of shatteringly crisp, golden perfection. No more tough or soggy pastry—just a melt-in-your-mouth vessel for the fabulous filling.
- Incredibly Cost-Effective & Homemade: Why spend a small fortune on a bakery pie of questionable quality? For the price of a few apples and pantry staples, you can create a dessert that feeds a crowd and tastes infinitely better. The pride of saying, “I made this from scratch,” is simply the cherry on top (or perhaps the scoop of vanilla ice cream!).
- The Perfectly Balanced Filling: We’re skipping the soupy, overly sweet mess. This filling highlights the apples themselves, enhanced with just the right amount of sugar, a warm kiss of cinnamon and nutmeg, and a secret thickener that sets it up beautifully. It’s a symphony of flavor and texture in every forkful. If you love these cozy spices, you should definitely try our Apple Crumble next!
Ready to bake the pie of your dreams? Let’s get started.
How to Make Apple Pie
Quick Overview
This recipe is all about achieving classic flavor without classic fuss. We’ll make a simple, reliable crust, a no-cook apple filling that packs a punch, and assemble it all for a stunning, bakery-worthy result. The active prep time is under 45 minutes, with most of the magic happening in the oven as your kitchen fills with that unforgettable aroma.
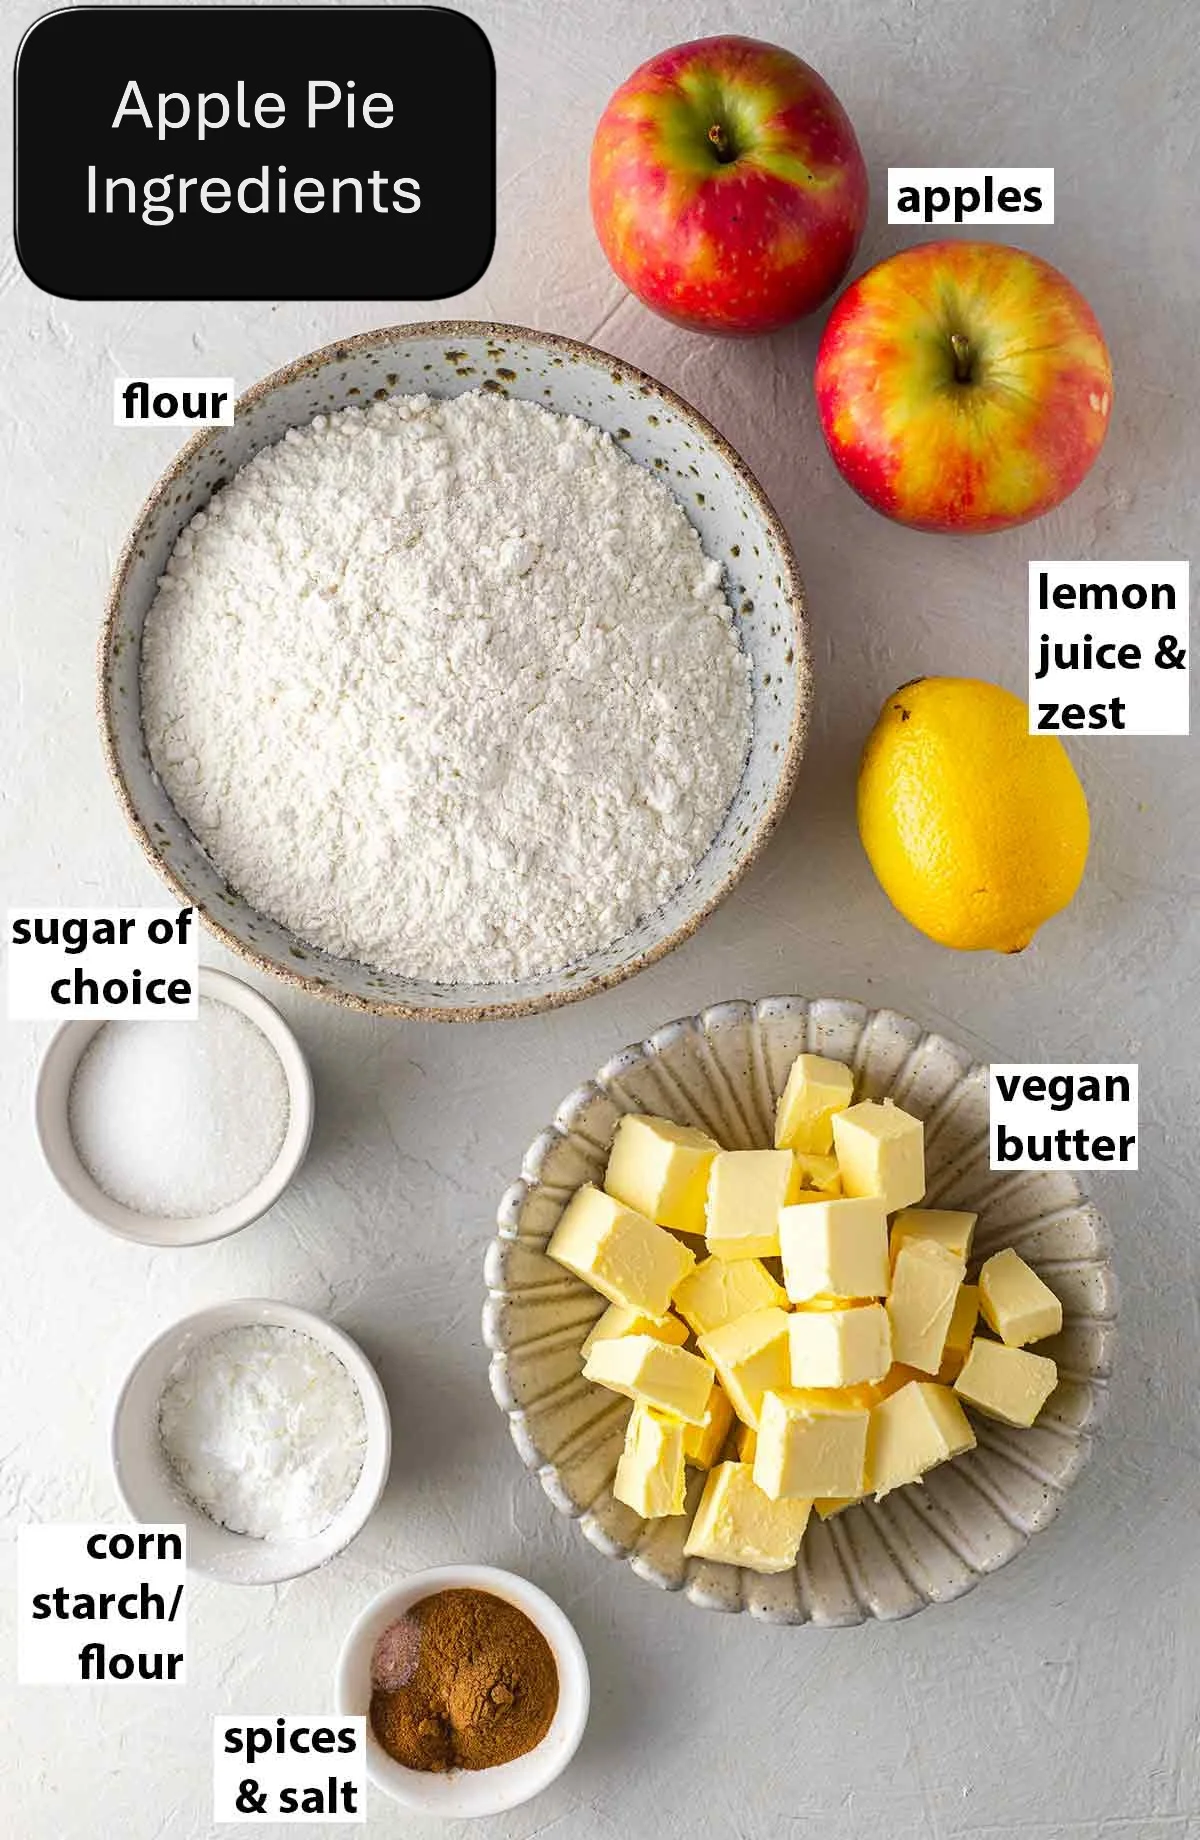
Key Ingredients for Apple Pie
For the Crust:
- 2 ½ cups (315g) all-purpose flour, plus more for dusting
- 1 teaspoon salt
- 1 tablespoon granulated sugar
- 1 cup (226g) unsalted butter, very cold and cut into cubes
- 6-8 tablespoons ice water
- 1 teaspoon apple cider vinegar
For the Filling:
- 6-7 cups (about 2-2.5 lbs) mixed baking apples (like Granny Smith, Honeycrisp, and Braeburn), peeled and sliced ¼-inch thick
- ½ cup (100g) granulated sugar
- ½ cup (100g) light brown sugar, packed
- ¼ cup (30g) all-purpose flour
- 1 ½ teaspoons ground cinnamon
- ¼ teaspoon ground nutmeg
- ¼ teaspoon salt
- 1 tablespoon lemon juice
- 1 tablespoon (14g) unsalted butter, cut into small pieces (for dotting)
- 1 egg, beaten with 1 tablespoon water (for egg wash)
- 1 tablespoon coarse sugar (for sprinkling)
Step-by-Step Instructions
1. Make the Dough: In a large bowl, whisk together the 2 ½ cups flour, salt, and sugar. Add the cold, cubed butter. Using a pastry cutter, fork, or your fingertips, work the butter into the flour until the mixture resembles coarse meal with some pea-sized butter pieces remaining. This is key for flakiness!
2. Bind the Dough: Combine the ice water and vinegar. Drizzle 6 tablespoons over the flour mixture, stirring with a fork until the dough begins to clump. Add more water if needed. Divide dough in half, shape each into a 1-inch thick disc, wrap tightly in plastic, and refrigerate for at least 1 hour (or up to 2 days).
3. Prep the Filling: While the dough chills, toss the sliced apples with lemon juice in a large bowl. In a separate bowl, whisk together both sugars, ¼ cup flour, cinnamon, nutmeg, and salt. Sprinkle this mixture over the apples and toss until evenly coated. Set aside.
4. Roll and Line: On a floured surface, roll one dough disc into a 12-inch circle. Carefully transfer it to a 9-inch pie dish. Gently press it into the bottom and sides without stretching. Trim the overhang to about ½-inch.
5. Fill the Pie: Pour the apple filling into the crust, mounding it slightly in the center. Dot the top with the small pieces of butter.
6. Top and Vent: Roll out the second dough disc. Place it over the filling. Trim the excess, leaving a 1-inch overhang. Fold the edges under and crimp decoratively. Cut 4-5 slits in the center of the top crust to allow steam to escape.
7. Bake to Golden Perfection: Brush the entire top crust with the egg wash and sprinkle generously with coarse sugar. Place the pie on a baking sheet (to catch drips) and bake in a preheated 425°F (220°C) oven for 20 minutes. Then, reduce the oven temperature to 375°F (190°C) and continue baking for 35-45 minutes, until the crust is deep golden brown and the filling is bubbling through the vents.
8. Cool Completely: This is the hardest step! Let the [Apple Pie] cool on a wire rack for at least 3-4 hours before slicing. This allows the filling to set perfectly.
What to Serve Apple Pie With
The classic pairing is, of course, a generous scoop of vanilla ice cream, whose cool creaminess melts into the warm pie. For a lighter touch, freshly whipped cream or a drizzle of caramel sauce are heavenly. For a brunch or breakfast twist, a slice alongside a sharp cheddar cheese is a timeless delight. A hot cup of coffee or a glass of cold milk completes the perfect picture.
Top Tips for Perfecting Apple Pie
- Keep Everything Cold: The secret to a flaky crust is keeping the butter cold until it hits the oven. If the dough gets warm while rolling, pop it back in the fridge for 10 minutes.
- Use a Mix of Apples: Combining a tart apple (like Granny Smith) with a sweeter, firmer variety (like Honeycrisp) creates a complex flavor and better texture that holds its shape.
- Prevent a Soggy Bottom: Baking on a preheated baking sheet helps crisp up the bottom crust. The flour in the filling also acts as a crucial thickener.
- Don’t Skip the Cool Time: Slicing into a hot pie will result in a runny filling. Letting it cool fully ensures clean, beautiful slices.
- Easy Decoration: Use cookie cutters on the top crust dough to create shapes (like leaves or apples) for a gorgeous, professional look before baking.
Storing and Reheating Tips
Storing: Once cooled, cover the pie loosely with foil or plastic wrap and store at room temperature for up to 2 days. For longer storage, refrigerate for up to 4 days.
Reheating: To reheat a whole pie or a slice, warm it in a 350°F (175°C) oven for 10-15 minutes (or 5-8 minutes for a slice) until the crust re-crisps. Avoid the microwave, as it will make the crust soggy.
Freezing: You can freeze a baked and cooled pie. Wrap it tightly in plastic wrap and then foil. Freeze for up to 3 months. Thaw overnight in the refrigerator and reheat in the oven as directed. Unbaked pie dough discs can also be frozen for up to 3 months; thaw in the fridge before rolling.
For More Recipes Visit: www.waniarecipes.com